...
To access a lookup list, leave the entry field blank and press Enter or F1, or choose OK. The lookup list appears and a record may be selected from the list. Refer to "Lookup Lists" for more information about using lookup lists.
...
When exiting a record and no changes have been made in the data record, you will not be prompted.
When exiting a record and one or more changes have been made:
Choosing File > Save/Exit from the menu or clicking on the


icon automatically saves and exits the data record without prompting to save. Be sure you intend to save the changes when selecting this option!
Selecting File > Next Record from the menu, clicking on the


icon, pressing the Esc key, or clicking on the X button in the upper right-hand corner of the window brings up a prompt similar to the one shown above.
...
Data records are displayed in columnar format.
Columns can be sized as needed. Rest the pointer on the right side of the heading boundary for the column to resize. When the pointer changes to


, drag the boundary to the desired column width.
Hide/show specific columns of information. Right-click in the list area and use the checkboxes to select fields you would like to be visible.
Resize or maximize the lookup list window as needed to display the data.
...
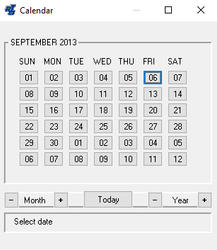
The current system date is the default. Click the Month - or buttons to move back or ahead a month, click the Year - or buttons to move back or ahead a year, then click on a day to select the desired date.
| Anchor | ||||
|---|---|---|---|---|
|
| Anchor | ||||
|---|---|---|---|---|
|
| Anchor | ||||
|---|---|---|---|---|
|
| Anchor | ||||
|---|---|---|---|---|
|
| Anchor | ||||
|---|---|---|---|---|
|
| Anchor | ||||
|---|---|---|---|---|
|
NOTE: The use of the Report Viewer feature requires special installation and setup procedures. The "RTA Workstation Disk" or CD needs to be installed on each workstation that will be using this feature. Refer to the documentation provided with your "RTA Workstation Setup" disk or CD for specific installation and setup instructions.
All of the RTA reports allow the option of viewing the report to the screen. When the View/Print option is selected, a separate window containing the report output appears.
To go up or down a line, click the single arrow buttons along the side of the window. To go up or down a page, click the double arrow buttons. To go to the beginning or the end of the report, hold down the shift key and then click the single up or down arrow buttons. The up arrow, down arrow, Page Up, Page Down, Home, and End keys can also be used for movement.
Most RTA reports are formatted for 132 characters. You can display all 132 characters on the screen or fewer characters if you prefer a larger font size for viewing. Select your preferred setting from the Display option on the menu bar. When viewing reports in 80-character mode, use the scroll bar along the bottom of the screen to shift the report from side to side.Once a user sets their preferred font size and resizes the viewer window to their preference, the system will recall and use those settings the next time a report is viewed on-screen.
NOTE: If your Report Viewer window does not allow the ability to display all 132 characters, install the esffix2.fon font file on your computer. This file is located in your fleet folder and needs to be installed into the Windows font folder. Installing the "RTA Workstation Disk" also enables this feature. The Windows Display resolution must be set to 800 x 600 or higher.
...
To save the displayed report, select File > Save or click on the Save Report icon in the toolbar. We recommend saving all reports in the Reports folder in the fleet subdirectory so they can easily be located later.
When prompted, enter the file name for the report and then choose Save. Saved RTA reports have an extension of .prt or .rpt and can be retrieved by selecting Reports > Accessed Saved Reports from the RTA main menu. Refer to "Accessing Saved Reports" later in this chapter for more information.
...
To save the displayed report, click on the Save This Report icon in the toolbar. We recommend saving all reports in the Reports folder in the fleet subdirectory so they can easily be located later.
When prompted, enter the file name for the report and then choose Save. Saved RTA reports have an extension of .rpv and can be retrieved by selecting *Reports > Accessed Saved Reports from the RTA main menu. Refer to "Accessing Saved Reports" later in this chapter for more information.
...