The toolbar contains the buttons and menus used to modify the report. Modifications can include aesthetic formatting, inserting formulas and images, linking reports, and much more.

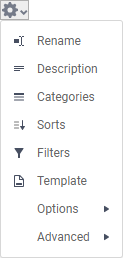
The toolbar begins with a dropdown menu. This menu controls changes, such as renaming and filtering, that affect the entire report. All other buttons on the toolbar require that a cell (or cells) in the design grid be selected.
Saving Reports
The report can be saved by clicking the save![]() button. The report will also be saved anytime it is executed.
button. The report will also be saved anytime it is executed.
...
Any action on a report can be undone by clicking  or pressing CTRL + Z. Undone actions can be redone by clicking clicking
  or pressing CTRL + Y.
...
The text of each cell can be formatted using dropdown menus and buttons in the toolbar. A cell or multiple cells must be selected for these tools to be used.
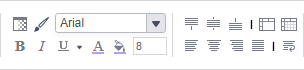
Font
- To change the font, use the searchable dropdown menu. The font names appear in the style that they represent.
- The buttons B, I and U make the font bold, italicized, and underlined, respectively.
- Text size can be controlled using the up and down arrows on font size menu.
...
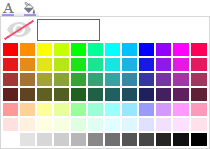
- To change the text color, click the foreground color
 button and then select a color or enter a hex value into the foreground box. Click the clear
  button to revert to the default color.
 - To change the background color, click the background
 color button and then select a color or enter a hex value into the background box. Click the clear button to revert to the default color.
Alignment
- Text can be aligned to the top, center, or bottom of a cell using the vertical alignment buttons.

- Text can be centered, justified, or aligned to the left or right of a cell using the horizontal alignment buttons.

- The wrap text button will begin a new line if the text is longer than the width of the cell.
...
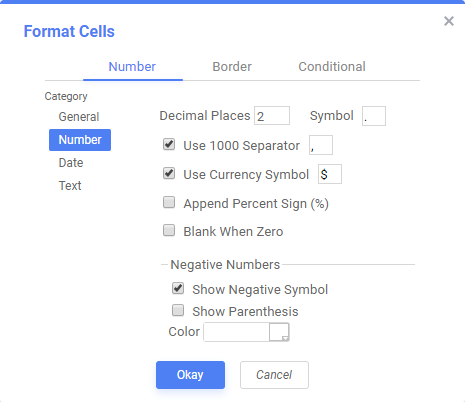
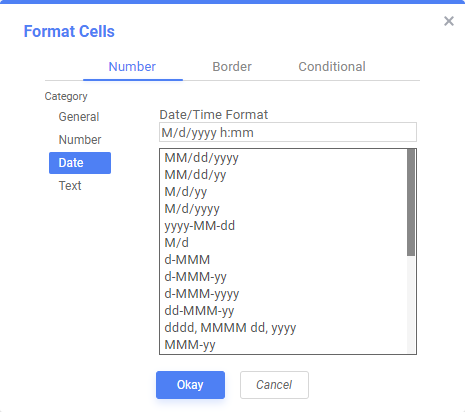
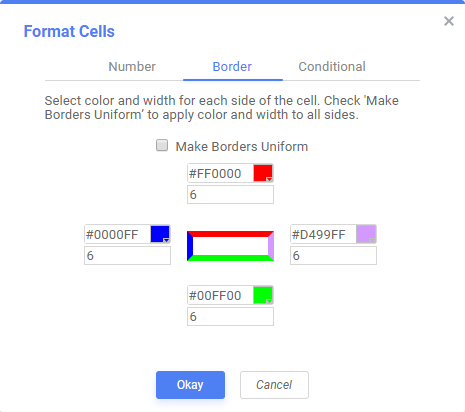
Cells can be formatted in the Cell Format Window. To open the window, click the format cell  button. The window has three tabs: Number, Border, and Conditional.
...
- General:
- General formatting automatically applies formatting to cell values.
- Number:
- Using the arrows, you can specify how many decimals to display. You can also set the symbol to separate decimals from whole numbers.
- Check the box ‘Use 1000 Separator’ to separate every 3 digits. You can set which symbol is used to separate digits.
- Check ‘Use Currency Symbols’ to have the currency sign appear in front of the number.
- Check ‘Append Percent Sign’ to have the symbol ‘%’ appear after the number.
- Check ‘Blank When Zero’ to leave the cell(s) blank if the value is zero.
- Check ‘Show ‘-’ Symbol’ to have a negative sign display in front of the number if it is negative.
- Check ‘Show Parenthesis’ to put ( ) around the number if it is negative.
- Selecting a color will make the number that color if it is negative.
- Date:
- From the menu, select the time/date format. (Ex. MM-yy will display a date as ‘Jun-97’).
- Text:
- Text format does not apply formatting to cell values.
...
- Uncheck ‘Make Borders Uniform’ to modify specific edges.
- To widen the borders, either key in a value or use the arrows in the width box.
- To change the color, either select a color from the drop-down or enter a Hex value.
Conditional Formatting/Suppression
...
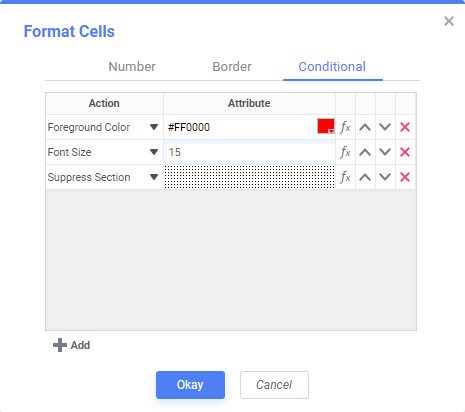
- Click the Add button to create a new conditional format. Each format must have an Action and a Formula that evaluates to True or False. Some Actions require an Attribute such as a color or a number.
- Select an Action from the dropdown. This action will occur if the formula evaluates to True. Actions include:
- Foreground Color – Sets the foreground color of the cell.
Attribute: Color - Background Color – Sets the background color of the cell.
Attribute: Color - Font Size – Sets the size of the text.
Attribute: Number - Bold – Bolds the text of the cell.
No Attribute - Italic – Italicizes the text of the cell.
No Attribute - Underline – Underlines the text of the cell.
No Attribute - Horizontal Alignment –Aligns the text of the cell horizontally.
Attributes: Left, Center, Right, or Justify - Vertical Alignment – Aligns the text of the cell vertically.
Attributes: Top, Bottom, or Middle - Suppress Row – Suppresses the row the cell is in.
No Attribute - Suppress Section – Suppresses the entire section that contains the cell.
No Attribute - Page Break – Starts a new page.
No Attribute - Click the Formula Editor
 button to set the condition for the formula.
...
- Use the up and down arrows to change the priority of the formats. If two formats share a common action and are both True then the lower condition will be applied.
- To remove a format, click the delete
 button.
Note: The formula is still calculated with respect to the section of the cell. For example, for a cell in a report footer, the formula {Order.Profit} > 1000 will return True if the last Order of the detail section profited more than 1,000. To make the condition see if the total profit was greater than 1,000 use the formula Sum({Order.Profit})>1000’.
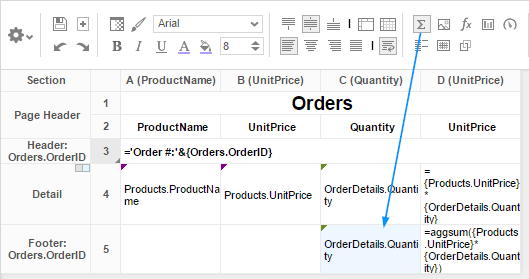
AutoSum
To quickly get a total on a Data Field, place the field in a Report or Group Footer and click the AutoSum  button. Alternatively, a sum can be created with the aggSum or Sum functions. See FormulasWhat are formulas for more information.
Note: Do not use AutoSum on a cell with an aggregate formula such as aggSum.
Images
An image from your computer can be added to a cell using the Insert Image button. This opens the Insert Image window. Select an image and click okay to add it to the report.
...
Complex calculations can be done using Formulas A formula can be added to a cell by keying it in manually or using the Formula Editor. To open the Formula Editor click the Formula Editor button.
Suppress Duplicates
...
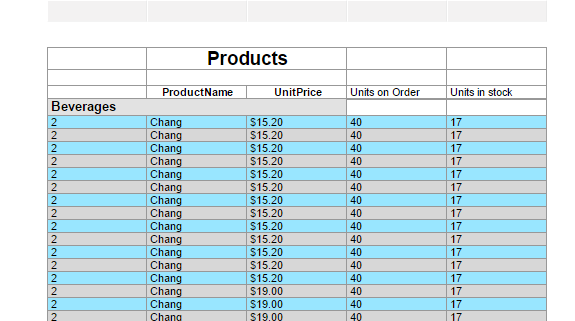
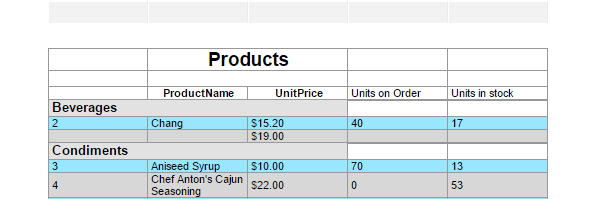
For example, the two reports below are identical, except the second image has suppressed duplicates for the customer column.