RTA Web - Reporting Tool
Refer to RTA Reporting for a breakdown of function in the reporting tool
This application consists of two sections. On the left is the Main Menu and on the right are Tabs. The Main Menu displays the available reports, folders, and buttons. Tabs can contain the New Report Wizard, report outputs, design windows, or help pages.

Main Menu
Through the Main Menu, you can:
- Create new reports
- Search for reports
- Read report descriptions
- Run Reports
- Export reports to other types (Excel, PDF, RTF, and CSV)
- Duplicate reports to save time setting up similar reports
- Edit reports
- Schedule reports to be emailed or archived
- Manage folders and report storage
Click the splitter icon to hide the Main Menu. This is located in the top left corner of the application's interface between the Main Menu and the Tabs.
The Main Menu can be broken down into two components: the Report Tree and the Report Descriptions Window.

Report Tree
The Report Tree contains the individual user's view of their applicable Folders/Sub-Folders and the Reports contained within them. Folders that are marked as "Read Only"( ) cannot be modified in any way (as designated by the administrator), with the Reports and Sub-Folders within inheriting the same permissions (unless otherwise specified).
A user can view a list of a folder's contents by double-clicking the folder name or by left-clicking the dropdown arrow next to the folder name. Right-clicking the folder name will bring bring up an options menu.
Note: Right-Click options are location- and item-specific.
Right-Clicking on Folders
If a user right-clicks on a non-"Read Only" folder within the Report Tree, a menu with the following options appears:
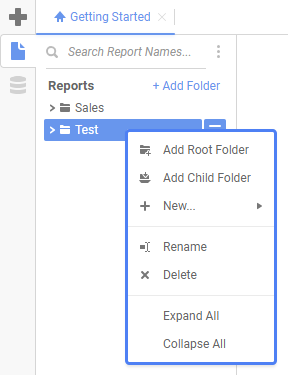
- Add Root Folder: Allows the user to create a new folder in which to place the existing folder.
- Add Child Folder: Allows the user to create a new folder within the existing folder.
- New...: Allows a user to add a new report to the folder and specify the report type.

 Rename: Allows the user to rename the folder.
 Delete: Allows the user to delete the folder.
NOTE. A folder and all of its sub-folders must be empty in order to delete the folder.
- Expand All: Expand the contents of the relevant folder, including all of its sub-folders
- Collapse All: Collapses the contents of the relevant folder, including all of its sub-folders.
Right-Clicking on Reports
If a user right-clicks on a report, a prompt with the following options appears:
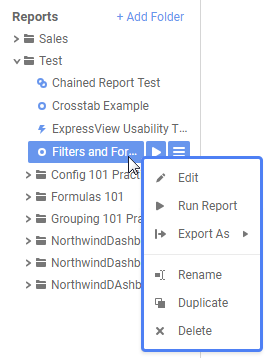
 Edit: Opens the Report Designer screen for the selected report.
- Run Report: Executes the report and displays it in HTML format.
- Export As: Allows the user to execute a report in any of the following formats:
- Excel — as a Microsoft Excel workbook
- PDF — as a Portable Document Format (PDF) file.
- PDF (Chained Report) v2021.2+ — available only for Dashboards, each tile appears as a page in a Portable Document Format (PDF) file.
- PDF (Snapshot) v2021.2+ — available only for Dashboards, an image of the Dashboard as it appears on screen appears in a single page of a Portable Document Format (PDF) file.
- RTF — as a Rich Text Format (RTF) file
- CSV — as a plain-text Comma Separated Values (CSV) file
 Schedule Report: Allows the user to schedule a report to run immediately, at a later time, or at regular intervals. For more information on scheduling reports, please see Scheduling Reports.
- Email Report: This allows a user to Email a report immediately to a specified email address. Clicking the an Export As option allows the user to specify the export format type.

Note: If neither 'Schedule Report' or 'Email Report' show up as options, Report Scheduling may not be enabled. For more information, please see Scheduling a Report.
- Rename: Allows the user to rename the report.
Note: If a user renames a Report that is used within a Scheduled Report, an error message will appear when attempting to Execute or otherwise modify the aforementioned Report types
 Duplicate: This allows a user to duplicate a report and place it in a specified folder
- Delete: This allows a user to Delete a selected report.
Report Descriptions Window
This window displays the description of the selected report. If the report was never given a description, this window remains blank when the report is selected in the Report Tree. For more info on Report Descriptions, please see Report Types.

Tabs
Tabs make up the application's main interface. This is where users build, design, and view reports as well as access help pages. Tabs can be closed by clicking the 'X' to the right of the tab name.

Tabs can be rearranged by clicking and dragging them left or right.

Right-clicking on a tab displays additional Tab options, such as closing the tab or closing all other tabs.

Toolbar
Once a report has been created and opened in the report designer, the user may interact with it using the Toolbar.
The Toolbar enables users to:
- Rename the report.
- Add, modify, or remove sorts and filters.
- Format cells’ font, font size, alignment, color, and borders.
- Use the Formula Editor to create complex functions.
- Insert charts, gauges, and images.
- Link reports, allowing users to drilldown for more detail.
- Save the report.
- Run the report in the Report Viewer.
- Export the report to Excel, CVS, RTF, or PDF.
- Add or remove Data Categories from the report.
- Add an Action Event. (If you do not see this option, your administrator may have disabled it.)
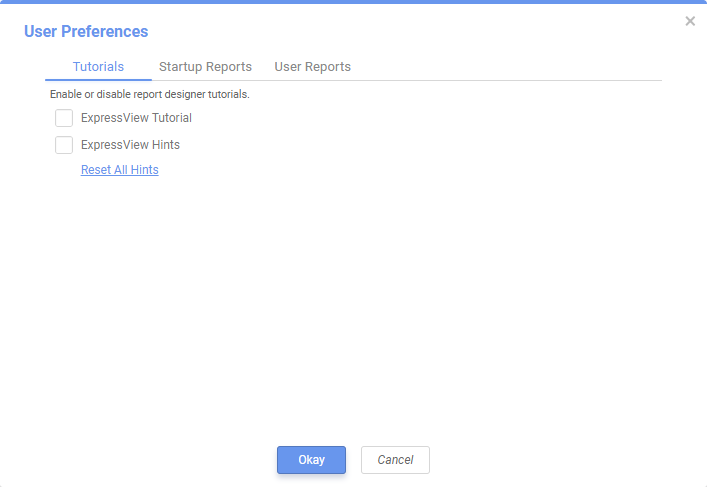
User Preferences
In the User Preferences (![]() ) window, the Startup Reports tab allows the user to manage which reports run upon opening the application. The User Reports tab allows users to manage reports with user adjustments saved on top of them. User Preferences are stored through cookies, server events, or an external interface per the Administrator's settings.
) window, the Startup Reports tab allows the user to manage which reports run upon opening the application. The User Reports tab allows users to manage reports with user adjustments saved on top of them. User Preferences are stored through cookies, server events, or an external interface per the Administrator's settings.
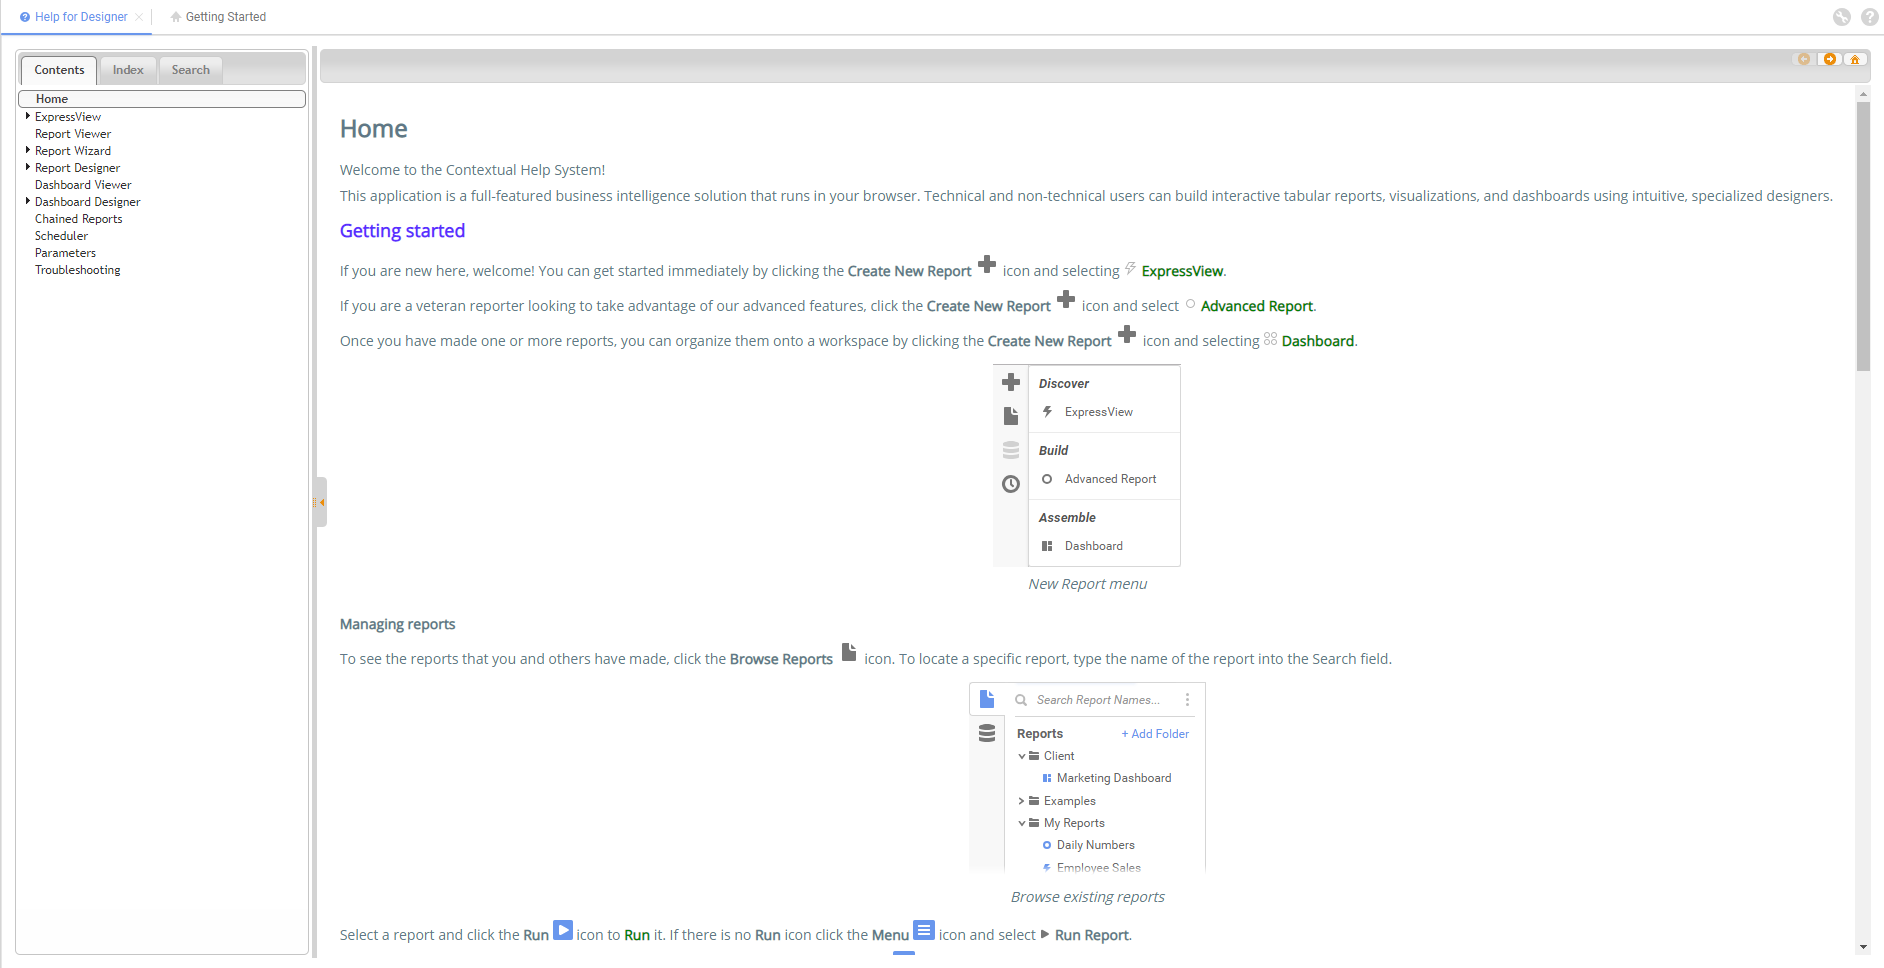
Help
Clicking on the custom help tool walks the user through specific portions of the application. This context-sensitive help menu is indexed and completely searchable, granting the user easy access to all information.
To learn more about getting started, continue with Report Types.