Versions Compared

Key

  • This line was added.
  • This line was removed.
  • Formatting was changed.

...

Panel

First, check the Downtime System Switch which is turned on in screen SSM/8111 - Line# 11.

  • Activate Downtime Module, set the switch to “Yes”.  This will turn on the Downtime module in the system.
  • Auto post Active/Listed, set this switch to “Yes” if  using Paperless Shop. This will cause the system to automatically clock the vehicle on and off Downtime as the mechanic Mechanic clocks on the job and completes the job. 

...

Panel
  • When a line is created on a work order, a Downtime window will pop up prompting you for the Start Date/Time

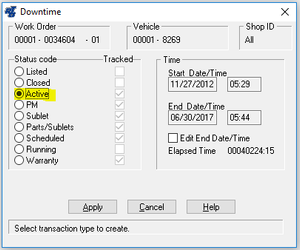
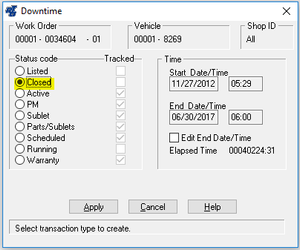
**You cannot enter a starting date/time earlier than the work order create date/time.**


  • The Downtime status code of “Listed” is automatically selected at this time. The Downtime status will stay as “Listed” until you change it

**“Listed" is not a tracked Downtime.** 

  • To change the Downtime to “Active”, which is a tracked as Downtime, select the “Post Line” option in the work order screen, and select the “Downtime” button.

 **The “Downtime Option” window will open.**


  • Check the “Active” button, and edit the End Date/Time if necessary. This will start the system tracking the Downtime.


  • When the line is complete, the vehicle is back in service and the line is ready to be closed, the mechanic would .
  • The Mechanic will go to the work order “Post Line” option and check the “Downtime” button.


  • The “Downtime” window will come up, check the “Closed” status button. Edit the End Date/Time if necessary.


  • Click the Apply button at the bottom of the screen.
  • The Downtime will be written to the system.

...

Panel

The System Switch (SSM/8111) Line #11 “Auto Post Active/Listed” (see setup above) is designed for Paperless Shop. With this switch set to “Yes”, the system automatically tracks and calculates the Downtime as the mechanic clock Mechanic clocks on and off the job.


  • When a line is created on a work order, the system will prompt for a start date/time for Downtime. It defaults to the current date.
  • When the Mechanic clocks onto the line in Paperless Shop, the System will change the Downtime to “Active” and start tracking the Downtime.
.
  • When the
mechanic
  • Mechanic completes the job and clocks off the job complete, the System changes the Downtime to “Close”. The System will calculate the total “Active” Downtime and finish the task by writing the information to the Downtime record. 

Reports (ROW/3418):

Panel

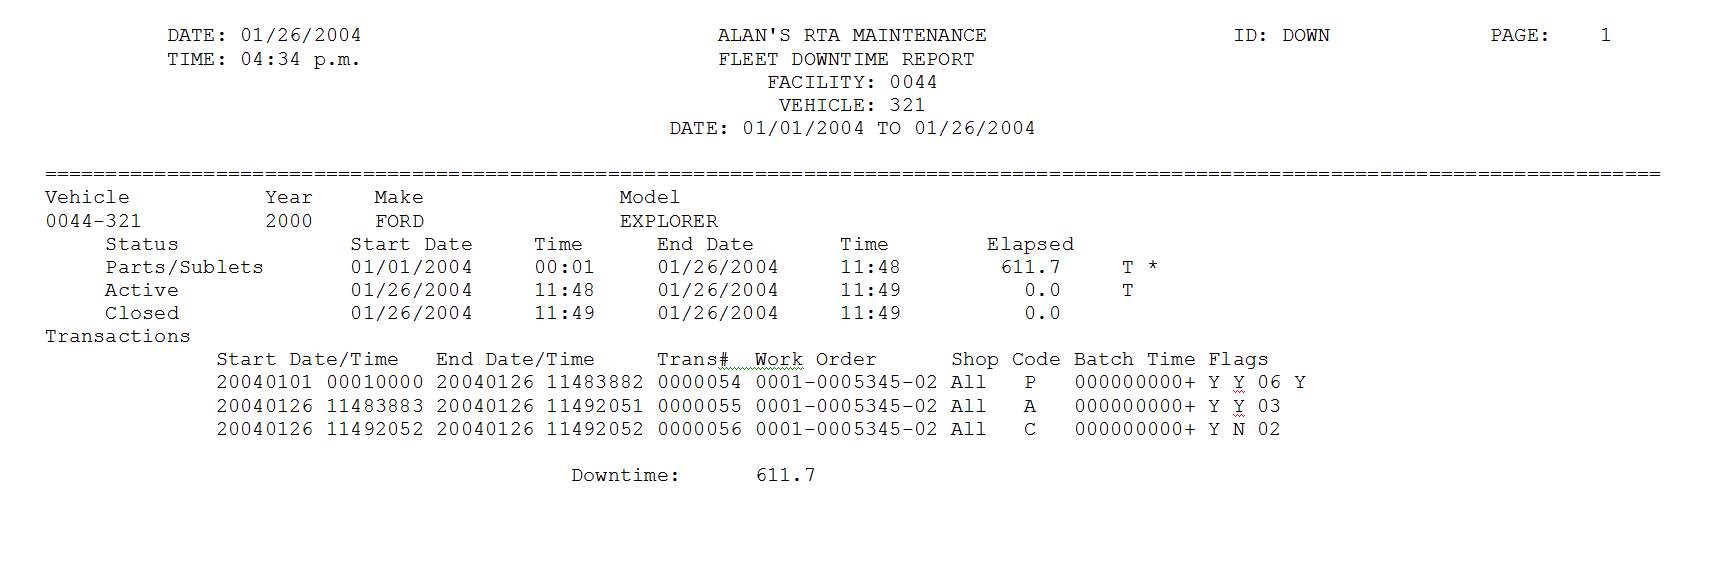
The Vehicle Downtime Report is sorted by Department or Vehicle.  You are prompted for: 

  • Starting/Ending Facility.
  • Starting/Ending Vehicle range:
  • Starting/Ending Department range:
  • Starting/Ending Date:
  • Print Time Line: Select Yes, to prints the time lines of the Downtime.
  • Print Transactions:  Select Yes, to print the transactions of the Downtime. 

Image Added


The report will display the following information:

 Page1:  

Vehicle Number, Year,  Make, Model.

Time Line:

Status:  Shows the Downtime Status Descriptions selected from the work orders.

Start Date/Time of the Time Line.

End Date/Time of the Time Line.

Elapsed: Total time.

A “T” in the line indicates the Status line is tracked.

An “*” (asterisk) in the line indicates the actual date(s) of the line was different than the selected date range of the report. 

Transactions:

Start Date/Time:

End Date/Time:

Transactions Number:

Work Order Number

Shop Code

Status Code

Batch Time:

Flags:

            First Column, Y=Transaction Closed

            Second Column, Y=Transaction Tracked.

            Third Column, Priority of the Downtime Status Code.

Fourth Column, Y=Either the actual Beginning or Ending Transaction Date does not fall within the range of the dates selected for this report.

Downtime: Total Downtime for the report.


Image Added


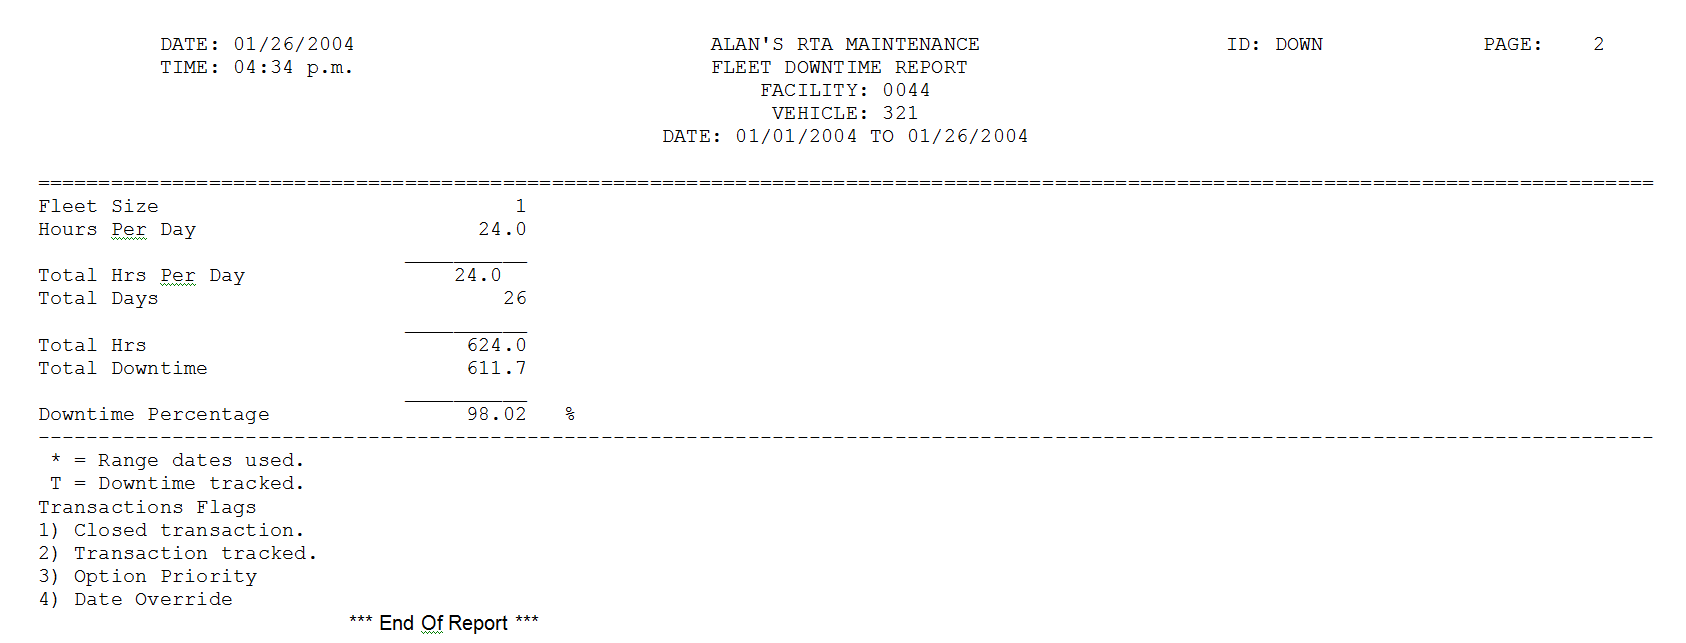
Page2: 

Fleet Size =  Number of vehicle processed for the vehicle range.

Hours Per Day = Number of hours per day entered in the Downtime setup screen (see setup above).

Total Hours Per Day =  (Hours Per Day ´ Fleet Size).

Total Days = Total days selected by the user, within the report date range.

Total Hours = (Total Hours Per Day  ´ Total Days).

Total Downtime = Total Downtime from page 1 of report.

Downtime Percentage = (Total Downtime  ¸ Total Hours).

 Image Added


Filter by label (Content by label)
showLabelsfalse
max5
spacesHK
showSpacefalse
sortmodified
reversetrue
typepage
cqllabel in ("export","vehicle","part","vmrs") and type = "page" and space = "HK"
labelsexport part vehicle VMRS

...