M5900 Portable Data Terminal
- Shelley Crouse
- Enoch Poston
The M5900 Portable Data Terminal is an ultra-versatile, high-performance barcode reader that is easy to use. To set up this data terminal for use with the RTA Fleet Management Program, follow these few simple steps.
Do Not Plug the USB Cable into the Data Terminal at this time!
Step by Step guide
- Insert the M5900 CD into the PC’s CD Drive. The current files on the CD should come up automatically. If not click on My Computer or Computer icon, on your desktop and select your CD or DVD Drive.
- Double click the Setup folder.
- Double click the “setup.msi” file.
The Setup Wizard will appear.
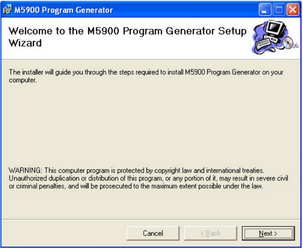
- Click Next.
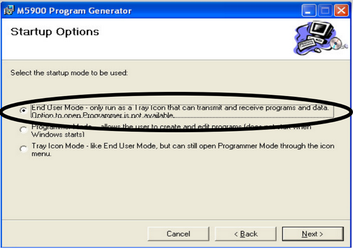
- Change to “End User Mode...”
When installing software. This will create the communications connectivity between the M5900 and the Computer using the USB cable. This will need to be installed on each PC terminal that will use the M5900.
- Click “Next”.
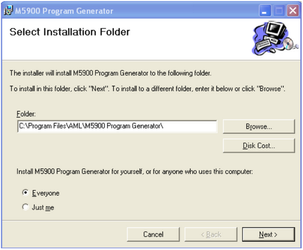
The program will default to installing the program in C:\Program Files\AML folder. RTA recommends checking the “Everyone” button.
- Click “Next”.
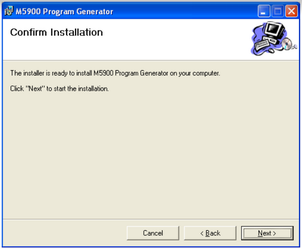
- Click “Next”.
While at this screen it’s important to turn on the M5900 and plug it into the USB cable.
This will assign the M5900 to your computer’s USB port.
- Click Close.
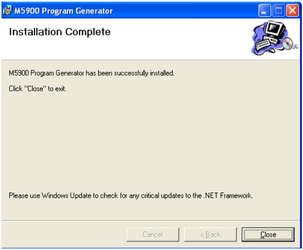
- Click “Close” to finish the software installation
After installation of the software and the M5900 is connected with the USB cable, the computer will recognize the handheld and you will see the icon appear in the taskbar.

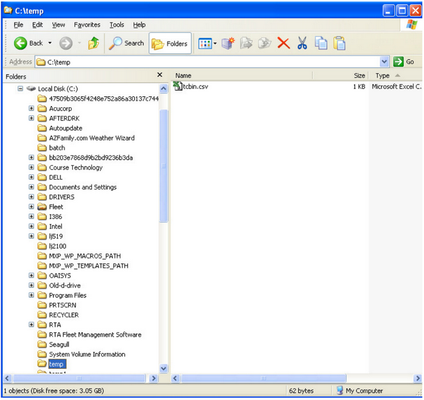
PC Setup:
For each computer that will download data from the M5900, it must have a directory called: C:\TEMP
If the PC already has that directory, the users will need permissions for the directory to Modify, Read, Write, Execute.
If the PC does not have the directory, one will need to be created, and users need permissions to the directory.
The M5900 is programmed to download all data files to the C:\TEMP directory, it MUST exist.
Running the Programs on the M5900:
To access the handheld programs,
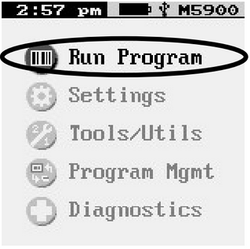
- Using the arrow keys on the keypad, highlight “Run Program” at the top of the screen, then press either “ENTER” key.
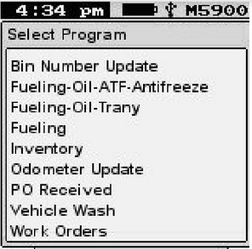
- Using the arrow keys on the M5900, highlight the program name and press the “Enter” key to access it.
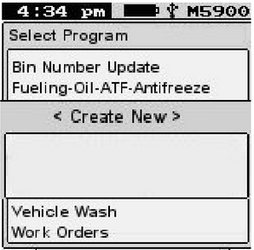
The M5900 will allow you to have multiple data files for a single program.
For example, when performing an inventory count, you may have multiple stocking areas. You can create a data file for Stocking Area A, and create another data file for Stocking Area B.

If no files exist, you will be prompted to "Create New"
- Highlight "Create New”
- press the “Enter” key.
- You will be prompted to enter a name for this data file. You must type a name to identify this data file. This is an alpha/numeric field, you can type numbers and/or letters. (Tip: Keep the names simple).
- After typing the name press the <Enter> key. You will be taken into the program.
- Follow the prompts on the screen for the program you choose.
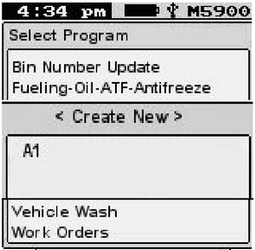
- If other files exist for the program, the data files(s) will appear under the “Create New” line.
- You can arrow down to the existing data file and press the <Enter> key to add to this file. It will begin where you left off, or select “Create New” and enter a new name for this data.
Uploading Data from the M5900 to a Computer:
- Right click the icon in your computer’s system tray.
- Choose the “Receive Files” option.

- The File Transfer window will appear.

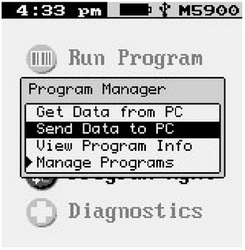
- From the M5900 main menu, arrow down to “Program Mgmt” and press the “Enter” key.
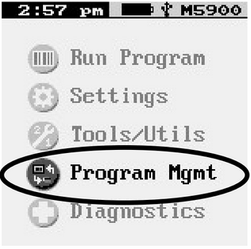
- Select “Send Data to PC”, and press the “Enter” key.
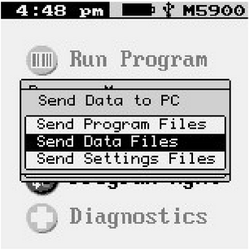
- Select “Send Data Files” and press <Enter>.
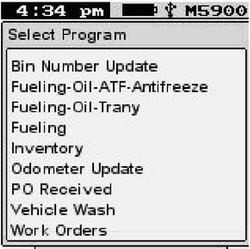
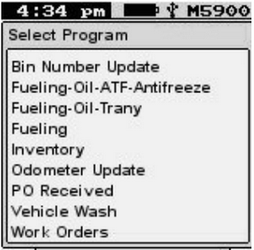
- Select the program containing the data you need to download.
- If more than one data file exist for the program, use the arrow keys to highlight the file and press <Enter> to upload.
****DO NOT select “SEND ALL”, if more than one data file exists for a program!****
****If you do, each data file uploaded will overwrite the prior data file!****
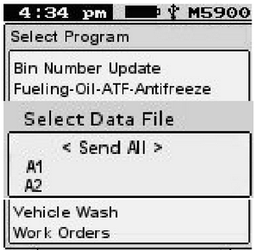
- If more than one data file exists in a program, you must process EACH data file separately in RTA, before uploading the next data file.
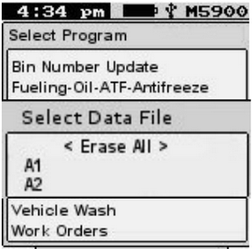
For example in the image above: In the M5900 Parts Inventory program, there are two data files, “A1” and “A2”. Select one or the other of the data files to process first.
If "A1” is selected first, upload this file, then go into RTA and run the Tricoder Parts Inventory (PC) program.
After completing the data for “A1” in RTA, Go back into the M5900 and upload data file “A2”, then in RTA run the Tricoder Parts Inventory Program (PC) and complete the process for the “A2” data.
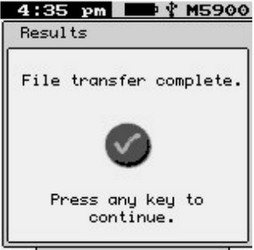
- When the upload is finished. Press any key to exit.
- The data file is uploaded to C:\TEMP
Uploading Data into RTA:
Below is typical of the upload screens in RTA for the handheld.
- This example is using the Tricoder Inventory Program (Parts→TriCoder Entry or PC).
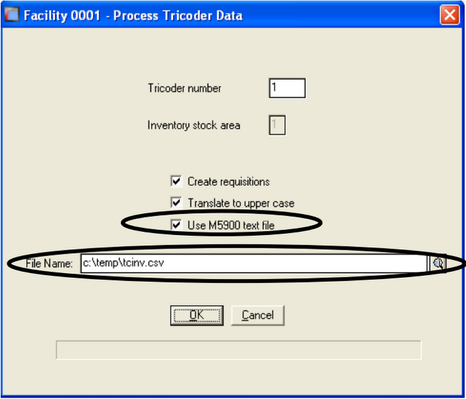
- Use M5900 text file: Check this box if you’re downloading from the M5900.
- File Name: Change the path to C:\TEMP\(filename).csv.
****Note: The M5900 automatically uploads the data files to C:\TEMP. If you have moved the file to another location, you must enter the path of the new location in this field.**** - Click “OK”. RTA will start processing the data file.
- Follow the prompts on the screen in RTA to finish processing the data.
Deleting or Erasing Data Files from the M5900:
Uploading data from the M5900 does not delete the file, nor are you prompted to delete the file after uploading.
The data files remain in the M5900 until you delete them.
The following instructions are how to delete the data file(s) from a program.
****Note: It is recommended that you delete the data files from the M5900 when processing is completed, so not to run out of memory.****
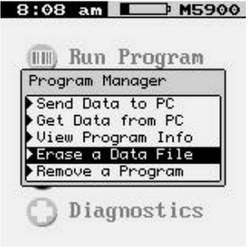
- From the main menu in the M5900, highlight “Program Mgmt”
- Press the “Enter” key.

- Select “Erase a Data File”
- Press the “Enter” key.
- Select the program containing the data file you want to erase
- Press the “Enter” key.
- You will be prompted to select a data file to erase.
- If you have multiple data files for this program, and want to erase all of them, highlight “Erase ALL” and press the “Enter” key.
- If you have multiple data files and do not want to erase all of them, highlight the one to erase and press the “Enter” key.
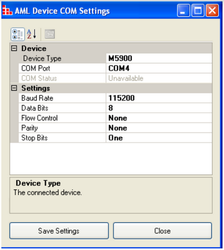
Setting Date and Time:
It’s very important to verify and/or change the date and time to your time zone.
All data at the time it’s entered in the M5900 is time stamped with the M5900’s date and time.
When the data is uploaded into RTA, RTA uses the date and time that it was time stamped, therefore it’s important that these dates are correct.
- From the M5900’s main menu, select “Settings”,
- Select “Set Date and Time”.
- Change your date and/or time accordingly,
- Select “Save”.
Non-Portable Mode:
Non-Portable mode allows the user to connect the M5900 to the computer with the USB cable, and when a barcode is scanned the handheld transfers the data to the PC, where the cursor is residing, simulating a keyboard entry.
You can access Non-Portable mode with either the M5900 Program Generator software or Softcom32 software (optional). Below is instructions using Softcom32.
Initializing Non-Portable Mode -
- Turn the M5900 on and plug it into the Computer with the USB cable.
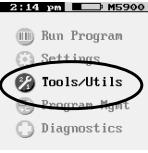
- On the M5900, highlight “Tool/Utils” and press the "Enter" key.
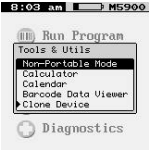
- Highlight “Non-Portable Mode and press the "Enter" key.
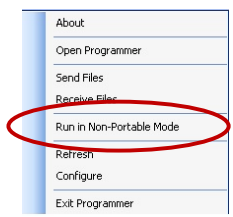
- In the computer taskbar, right click on the M5900 icon.

- When the following window appears, select “Run in Non-Portable Mode.
The M5900 is now in non-portable mode. You can scan barcodes and the barcode numbers will appear where the cursor is flashing, on
the Computer screen and on the M5900 screen.
Exit Non-Portable Mode -
- To exit Non-Portable Mode, on the M5900, press the “Esc” key, located at the lower left corner of the keypad.
- On the Computer, right click the M5900 icon in the Taskbar and select “Stop Non-Portable Mode”.

The M5900 handheld comes pre-loaded with the RTA data collection programs, all options are documented below.
These programs are used to capture hundreds of data transactions, which can then be uploaded into the RTA system.
To access the programs and collect data, see the previous section above entitled “Running the Programs”, if more instructions are needed.