Initial Setup
- Enoch Poston
Add Required User Account
Go to SUM System < Setup Users < File Maintenance. Add KPIEMAIL to your users. RTA requires a specific user to be created called "KPIEMAIL" to send the Email. Make sure to give the User full rights to all the facilities. Give it a password so no one can use the User because it has full rights.
Email Setup
In the Setup User on the top you will see an Edit drop down. You will then see SMTP information. Put in the SMTP info that you have for your Email Server. With Email turned on, the Scheduler program will send notifications to the customer when changes are made to their Service request (See SMTP Settings in Manual). Refer to user configuration section for details on configuring Email accounts. The SMTP settings you put in will be the Sender Email for the emails, which means that when they reply it will go back to the Email account you set up in that.
****You will need to get your SMTP settings from your IT Dept if you're not sure what it is.
Windows Task Scheduler
The Dashboard Email can be set up to run manually or automatically.
Automatic Setup
*Our Recommendations are in the pictures for the next steps
- Create a new Windows Scheduler task by clicking on computer's Start button.
- Type 'sched' in the Search field and hit Enter.
- Click on 'Create Basic Task' located on the screen's right hand side.
- Name task and add a description (optional).
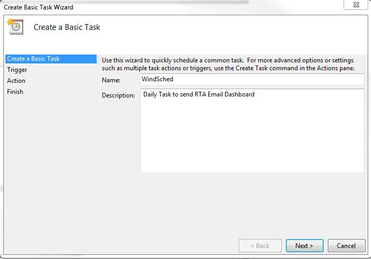
- Click Next.
- Select options when you want to start the task (Figure shown below), and click Next.
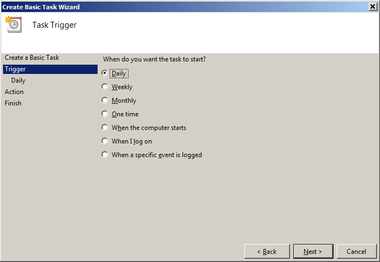
- Set options based on how you want to start the task (make sure if you use the specific time to trigger the task to set it for a time that the computer will be on) and click Next.
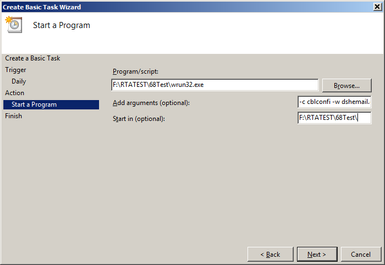
- Select the 'Start a program' option, and click Next.
- Enter the path where the WRUN32.EXE file is stored in the Fleet folder, add the arguments '-c cblconfi –w dshemail.cob', and enter the Start in path.
Note: This information can be found on the screen shown in the Manual Setup section above.
The screen below shows the path where our copy of RTA is stored.
- Click Next
- Click Finish.