Clocking onto a Job
- Enoch Poston
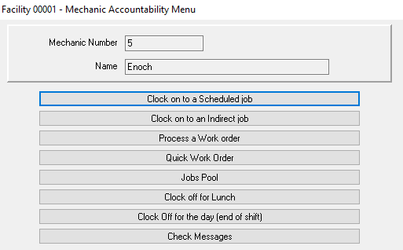
To work on an assigned job, clock in and then select the Clock on to a Scheduled Job option from the Mechanic Accountability Menu. The Scheduled Jobs window will be displayed.
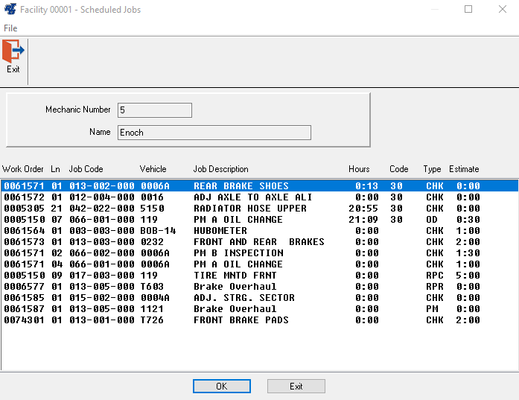
All the jobs that have been assigned to this mechanic will be listed in this window. Partially completed jobs (displayed with a code of 30) will be listed first followed by a list of the jobs that have not yet been worked on. These jobs are sorted by the Paperless Shop priority code with the highest priority jobs being listed before the lower priority jobs. Some basic information is displayed for each job line such as the work order number, VMRS or job code, vehicle number, job description, and the estimated time it will take to complete the job. If the mechanic has more than 10 assigned jobs, the scroll bar along the side of the display can be used to view the other jobs. The up and down arrow keys can also be used to go from job to job.
To select a job, highlight the desired scheduled job and then click the OK button or simply double-click on the desired scheduled job. Another window will be brought up to confirm the selection.
Any work order and/or line notes typed in by the service writer will appear in this window. The use of notes can be extremely useful to the mechanic when additional information about the job or vehicle is presented before he starts the job.
To confirm the job selection; click the OK button or press the ENTER key. To select a different job, click the CANCEL button or press the ESC key.
If you are utilizing the manual method of the vehicle status tracking feature, and the system is configured to prompt for status changes in paperless shop (Miscellaneous Parameters I (screen SSI, option #39)), then the mechanic will additionally be prompted to specify the current status of the vehicle. The status options are user configurable, but most will use a designation such as "currently in shop", or "now being worked on".
Once a job has been selected and confirmed, the Working on Vehicle window will be displayed: At this point, the mechanic is now clocked on the job. The labor hours for this job will be computed automatically from this point until the time he clocks off this job. To exit this window, click the OK button or press the ENTER key. The Mechanic Time Clock window will be displayed again. Now the mechanic can start working on the vehicle and the shop terminal is ready for the next mechanic to clock on or off a job.