How to Setup PM Schedules
- Enoch Poston
- Dallin Dastrup
- Shelley Crouse
Basic Info
Any activity that is performed at regular intervals can be set up in RTA as a Preventive Maintenance (PM). The RTA system can track up to 260 PMs per vehicle. Once PM schedules are set up for a vehicle, reports can be printed to show which vehicles are due for scheduled maintenance. As PM jobs are completed, RTA updates the vehicle’s PM record(s) and projects when the next PMs will be due.
Step by Step Guide
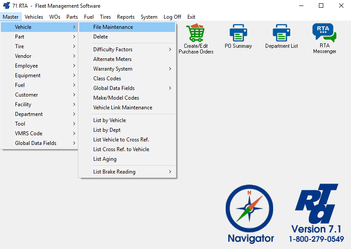
- Select Master > Vehicle > File Maintenance (MVM) from the RTA main menu.
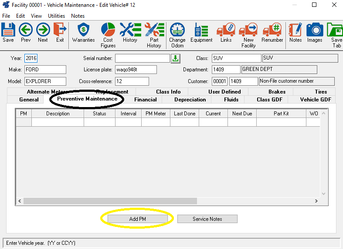
- Add a new vehicle record, if you have not already done so. Add vehicle data as needed and go to the PM Schedule sub-window. If you are adding PMs to an existing vehicle record, bring up the vehicle record, select the “Preventive Maintenance” tab, and select the “Add PM” button.
Enter the PM schedule information. ****Click to get a description of each section of the PM

PM Code (Required)
Enter up to two characters to identify the PM; the first character must be a letter from A-Z; the second character (optional) must be a number from 0-9. Try to come up with a coding scheme that categorizes the PM’s in an orderly manner. For example, PM “A” for a 3000 mile service; PM “B” for a 6000 mile service.
****NOTE: PMs can be added in any orderInclude PM
The RTA system is capable of nesting PMs (i.e. a PM can include another PM). Enter the PM code of the PM you wish to nest within this PM. For example, PM A could be a Lube, Oil, and Inspection; PM B could be a PM A plus a fuel filter; and PM C could be a PM B plus an air filter and transmission service. As you can see, PM B includes PM A, and PM C includes both PM A and PM B. Nesting PMs makes data entry easier and faster because when a PM is completed, the RTA system will update that PM record as well as the nested PM record(s).
****NOTE: PM’s can only be nested in ascending order (A is the lowest; Z is the highest). Therefore, PM A cannot be nested with any other PMs while PM C can include PM B, PM A, or any PM from A to B9—but it cannot include PMs C1 through Z9.VMRS Code (Required)
Enter the VMRS code for the PM. If you are not certain of the VMRS code, press “F1” and select a VMRS code from the lookup list. Codes 066-001-000 through 066-009-000 are set up in the RTA system for PMs, but any VMRS code may be used. When the VMRS code on a Work Order line matches exactly with the PM VMRS code, the system will automatically update the Vehicle’s PM record (and nested PM records) when the Work Order line is completed. One labor entry must be posted to the PM Work Order line.
****NOTE: If using the six-digit VMRS code, the last three digits will be “000” by default.Template Work Order (Required)
The Work Order facility field will be populated with the default facility number. In the empty field, enter a Template Work Order number, or press “F1” and select it from the lookup list. The Work Order template specified here will be used when the option to automatically create Work Orders for PMs due is used (VV, VD or 121, 122).
****NOTE: Template Work Orders can be added at anytimePM Part Kit
The PM Part Kit facility field will be populated with the default facility number. In the empty field, enter a Part Kit number, or press “F1” and select it from the lookup list. The Part Kit number specified here will be displayed as the default Part Kit at the time a Work Order line is created for this PM service.Primary Meter (Required)
Select the primary method that will be used to track this PM. The choices will vary depending on the vehicle’s Meter type and Alternate Meters. The method selected here will be displayed on the vehicle’s PM Schedule window. PM information for the non-primary Meters can be viewed by clicking on the down arrow or the PM letter buttons.Description (Required
The VMRS code description is displayed as the PM description by default. Press the “Tab” or “Enter” key on your keyboard to accept the default description, or key in your own description for this PM. The description entered here will be printed on the PM report to help identify what type of service is due.One-time PM
This button is checked only when a scheduled PM is to be performed only once, such as a vehicle inspection prior to the expiration of a warranty.
****NOTE: Most PMs are performed on a recurring basis. Therefore the One-time PM option is not commonly used.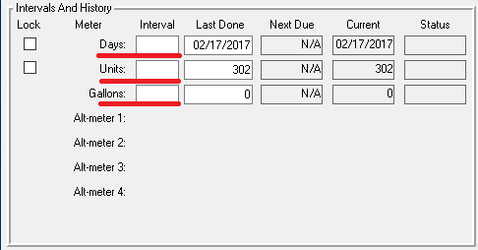
Intervals (Required)
PMs can be tracked by various combinations of gallons, hours, kilometers, miles, days, units, and various Alternate Meters. The setting of the Primary Meter determines the required field within intervals. You may enter the intervals for each additional method you wish to use to track this PM. For example, if this PM is due every 150 hours, then the Primary Meter should have been set to Hours, and you would enter “150” in the Hours entry field. If the PM is completed every 90 days or 3,000 miles, then either Days or Miles may be set as the Primary Meter. Then you would enter “90” in the Days entry field and “3000” in the Miles entry field. If you are tracking Alternate Meters for this vehicle, you would also be able to specify the PM interval for the Alternate Meters. Once an interval has been entered, the RTA system will calculate when the next PM is due.
****NOTE: When the Lock checkbox is selected, RTA ignores the Last Done field. For example: With the Lock check box selected, a PM that is set up to be due on the 10th of the month will always come due on the 10th, even if the last PM was done on the 5th or the 15th. Likewise, a 3000 mile PM will come due at 3000, 6000, 12000, etc. even if the previous PMs were complete at 3100, 6200, or 8800. For most PMs, do not check the Lock button.History
The PM history can be entered in the Last Done column. It is recommended that the Last Completed date and/or Meter be entered for the PM, so PM reporting will be accurate and effective immediately. If no information is entered into the History, the Current Odometer and the Current Date will be posted as the latest history for this PM. The PM reports will indicate when a PM is Due or Due Soon based on all the intervals and PM history entered here.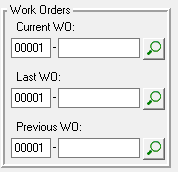
Work Orders
The system will automatically update these fields as PM Work Orders are opened and closed. If an open PM Work Order line exists, that Work Order number will be displayed in the Current Work Order field; the previous two closed Work Order lines will appear in the Last Work Order and Previous Work Order fields.
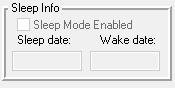
Sleep Mode
Enabling the sleep mode will allow you to delay your PM until a selected date that you enter. Say your vehicle is going to be inactive for 6 months, you will not RTA to start tracking down the time for the PM so you will enable the sleep mode to wait until that time.
Fix the "Last Done" on an incorrect schedule
With the PM Schedule line open on the screen, click "Post" in the bottom-menu. An information box will prompt
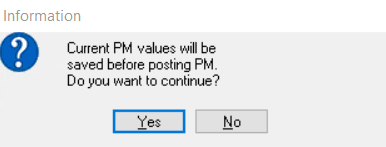
Click "Yes" to confirm the data to be saved, opening the "Last Done" column in the PM Schedule. Edit the row that was incorrectly noted and click "OK" to save and reset the Next Due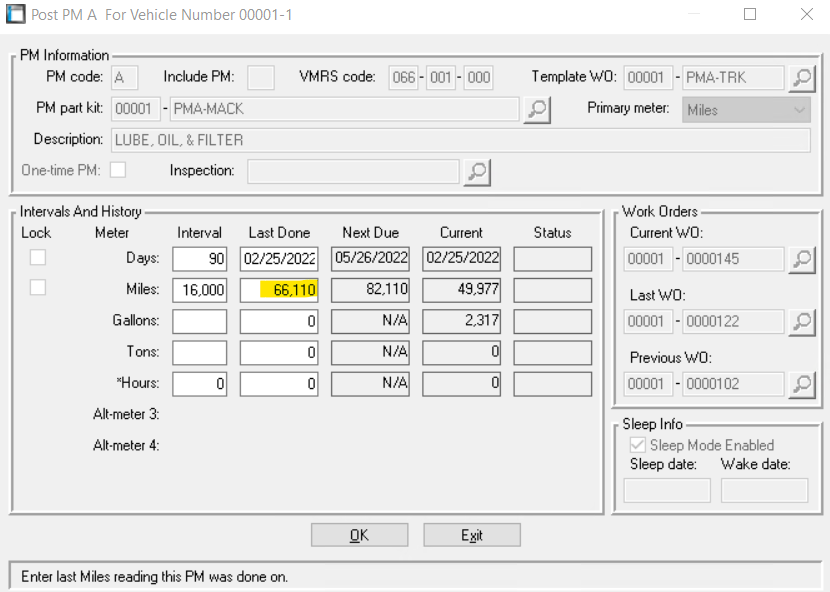
- Click the "OK" button to save and exit. If you want to add another PM for the same vehicle, select the "Add PM" and repeat steps #2 and #3. Once all PM schedules have been set up for this vehicle, select the "Exit" button to save the PM information and return to the Vehicle Maintenance Window.