How to Add Parts
- Enoch Poston
- Shelley Crouse
Basic Info
The Part File contains information about each individual part. In addition to current pricing, inventory, and vendor information, the file also contains data on tracking information, part warranties, re-order settings, as well as purchase and usage history.
Step by Step guide
- Select Master > Part > File Maintenance (MPM) from the RTA main menu.

- Enter a part number and select “Add”. The part number is a text field up to 25 characters.
****NOTE: For simplicity, consistency, and faster data entry when posting parts, it’s best to omit spaces from part numbers. If you plan on using bar codes, now or in the future, do not use the / or # or & characters in your part numbers.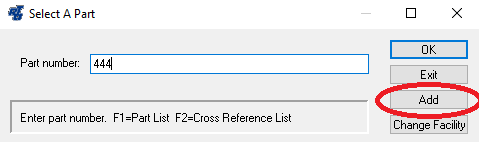
Enter the information for the part.
****NOTE: Use the “Tab” key, on your keyboard, to navigate through the fields. This will help to assure that you do not skip any fields.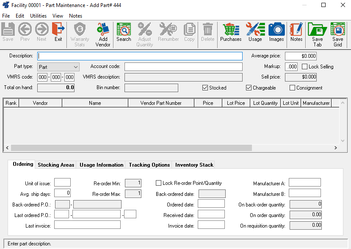
****Click to expand for a description of each field- Add a vendor for the part.
****NOTE: If you use the “Tab” key to navigate through the fields, the Add Part Vendor screen will appear as you navigate from the Consignment checkbox. If the Add Part Vendor screen is not displayed, you can select the Add Vendor button at the top of the window to display the screen and continue. You must add a vendor to the part record before saving the part in RTA.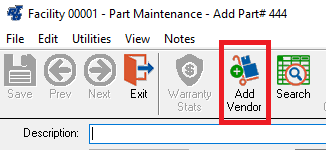
Review the fields in the Add Part Vendor screen. Edit as needed.
****NOTE: The required vendor data will already be populated in this screen. If you have this vendor’s price for this part, you can edit it now.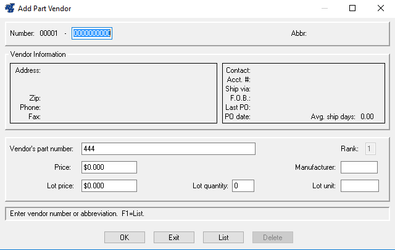
****Click to expand a description of each field
- Select the "OK" button
- Repeat steps 5 and 6 as needed for additional vendors or cross-reference numbers.
- When all vendors and cross-reference numbers have been added for the part, select the Cancel button. This will return you to the main part record screen.
In the lower section of the screen are tabs labeled: Ordering, Stocking Areas, Usage Information, and Tracking Options. ****Click to expand information on each tab
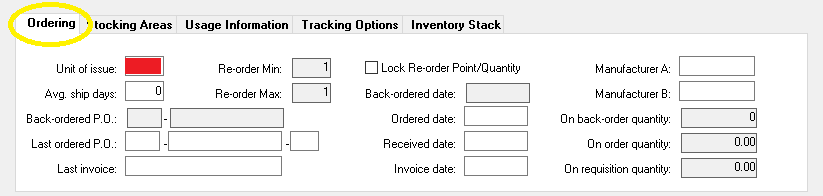
Unit of Issue: (Recommended)
Enter up to three characters as an abbreviation for the unit of issue to use when posting (i.e. EA for Each, QT for Quart, GAL for Gallon, LTR for Liter, IN for Inch, FT for Foot, etc…)
Lock Re-Order Point/Quantity:
Check this box if wishing to manually set the re-order point and quantity.
****NOTE: The Lock Re-order Point Quantity button must be checked for this option to be available
Re-Order Point:
When inventory is below this quantity, a requisition is generated for the Re-order Quantity.
***NOTE: The lock re-order point quantity button must be checked for this field to be edited.
Re-Order Quantity
The quantity to be requisitioned once the part has been flagged for the re-ordering.
****NOTE The lock re-order Quantity button must be check for this field to be edited.
Manufacturer A & B:
This are optional fields for your records.
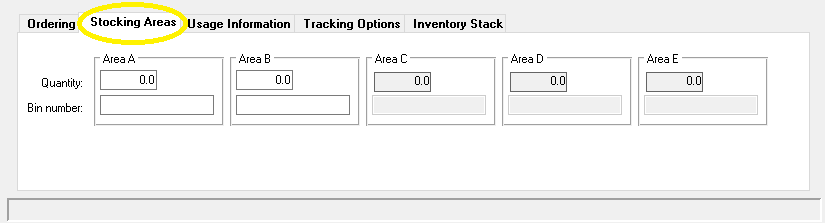
Quantity: (Recommended)
Enter up to seven leading and one trailing numeric characters for the on-hand quantity in Stocking Area A.
Bin Number: (Recommended)
Enter up to ten characters designating the bin location for the part. If you do not have a bin location to reference, enter a reference that can be used to group parts that would be counted together during inventory (i.e: FILTERS for filters, LIGHTING for bulbs and lights, BELTS for serpentine and v-belts, HOSES for radiator hoses, heater hose, etc..).
As parts are posted to work orders, the usage is tracked in the Usage Information Tab. No entries are required in this area.
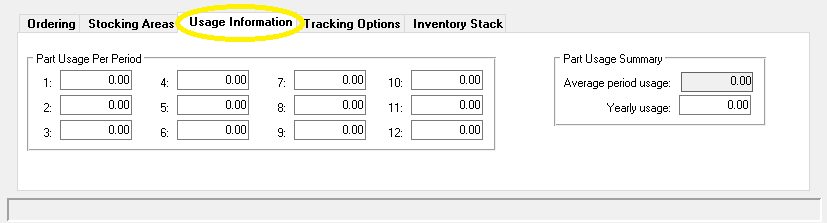
****NOTE: Field #1 is the current period. At each End of Period processing, the data from field #1 is moved to field #2 is moved to field #3, etc..., giving a year's usage at a glance. You can manually put in your yearly usage if you know it and RTA will fill in the rest.
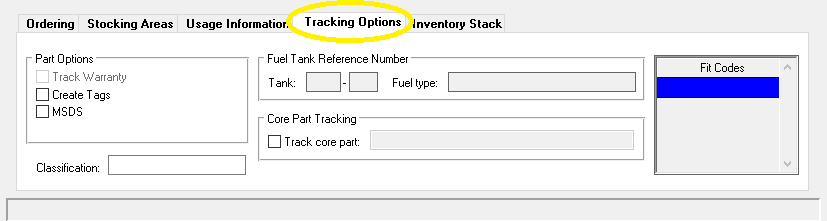
Track Warranty:
This checkbox is only available if a VMRS code was input for the part. Check this box to access warranty for the part, and then indicate the warranted miles and/or months in the Warranty Statistics screen that pops up.
Create Tags:
Check this box if you wish to flag the part for printing part tags in the future.
MSDS:
Check this box if you wish to flag the part as having a Material Safety Data Sheet (MSDS) on file at your location.
Fuel Tank Reference Number:
RTA populates this field with information for “Fuel” Part types when they are assigned to a tank within RTA.
Track Core Part:
Check this box if the part has a core (the core would have its own part number, which would be entered into this area).
Fit Codes: (Recommended)
In this 8 digit text field, you can enter user-defined Fit Codes (vehicle numbers, models, etc…). This can then be used to verify Part application prior to issuing the part to a mechanic. Reports can also be generated based on Fit Code. If you are printing part tags, the first few Fit Codes for a part are printed on the part tag for reference.