How to Add a Work Order

Basic Info

The Work Order module integrates with other RTA modules. Through Work Orders, PM records are updated, Vehicle History is tracked, Vehicle Warranty is updated, Part Warranty is updated, Warranty Credits are tracked, and Outside Repairs are tracked.

Standard Work Orders

The Standard Work Order process is designed for shops that prebuild Work Orders and schedule service. It can also be used for work that has already been performed. When processing Standard Work Orders, the sequence is as follows:

1. Add header information (Vehicle, Customer and Reason Code).

2. Add Work Order Lines for each job to be performed.

3. Post Parts, Labor, and other costs to each job.

4. Close each work order line after it is completed.

5. Close the Work Order after all work order lines have been completed.

Step by Step guide

To create a Work Order, follow the steps below. (Depending on settings in your RTA System Parameters, you may or may not be prompted for some of the information described)

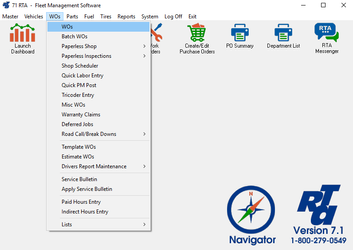
  1. Select WOs > WOs (WW) from the RTA main menu.
  2. Select the “New WO” button.
  3. Enter the vehicle number or press “F1” and select from the lookup list. Then press the tab key.
    NOTE: After a work order has been saved, the vehicle number CANNOT be changed so make sure the vehicle number is correct!

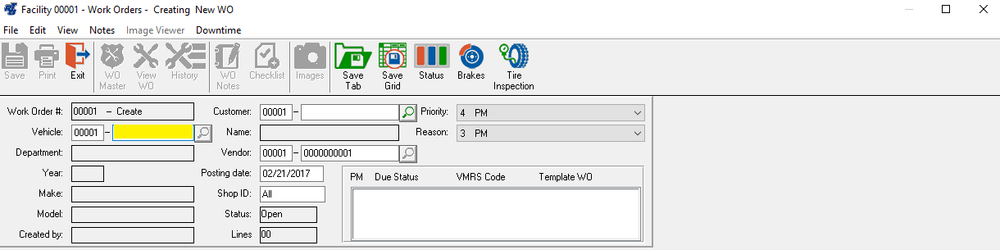
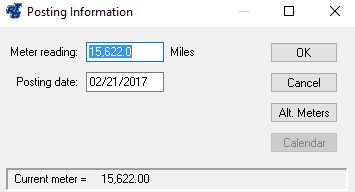
    1. A pop-up should show the posting information. Here you can update the current odometer of the vehicle. If the work order is for work that is yet to be performed, key in the current meter reading from the vehicle. If opening a work order for work that has already been done, key in the meter reading from when the work was completed.
    2. Enter in the posting date. If the work has already been completed, put the date that it was completed. If the work is yet to be done, leave it at today's date.
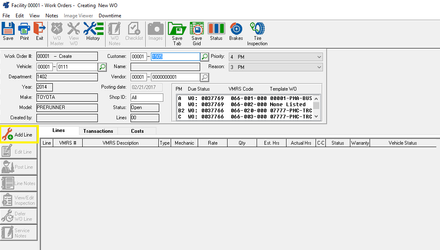
  4. The create a new work order screen will be displayed again. Fill in additional header information. Click on each field to expand a description of each
    1.  Customer (Recommended)

      The customer number will be automatically filled in if a customer was specified for this vehicle in its master file. You can key in the customer number, or press “F1” and select from the lookup list.

    2.  Vendor

      If this WO will include work done by a single vendor, you can specify the vendor number in this field. Multiple vendors may be used on a single work order; however, then the reference is only available within each respective work order line.

    3.  Priority

      This code is an optional feature based on your system’s configuration settings. If active, use the arrow to the right of the field to select the priority level of the WO from the drop down menu

    4.  Reason

      This code is an optional feature based on your system’s configuration settings. If active, use the arrow to the right of the field to select the reason for the WO from the drop down menu.

    5.  PM Status

      Displays status of any PMs past due or due soon. Double-clicking on any of these PM notifications will add a job line to perform that PM.

  5. Next you will need to add work order lines to post work to a work order. You can get a step by step guide for this on the page How to Add a Work Order Line. You can go to the page by clicking the link: How to Add Work Order Lines or open up the page in this window by clicking the expandable below.

     How to Add Work Order Lines

    Step by Step guide

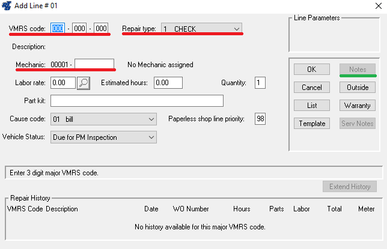
    1. Select the "Add Line" button in the Work Order window.
    2. Enter the information into the fields of the "Add Line" window. Click to expand a description of each field

      1.  VMRS Code (Required)

        Enter the VMRS code for the work on this work order line, or press “F1” and select from the lookup list. Be as specific as possible. This code will be used later to search for Repair History and other reporting features.

      2.  Repair Type (Required)

        Using the drop-down menu, select the repair type most appropriate for this job. These codes determine what type of repair was done. Some of them have special purposes within the software such as defining Preventive vs. Corrective maintenance costs, defining Damage cost vs. Normal repair cost, and designating a repair as being performed by an outside vendor instead of “in-house”.

      3.  Mechanic or Vendor (Required)

        If you are building the WO prior to the repair being done, you can specify the mechanic that you want to schedule to perform the work. If the line is specified as an outside repair, you will be prompted for Vendor and PO# instead of mechanic information.

      4.  Estimated Hours

        If you are tracking mechanic productivity, this is the estimated time to perform the repair. The mechanic’s actual time will be compared to this estimate to calculate his productivity.

      5.  Quantity

        Used to specify if the job is to be performed more than once (ex: replace multiple tires). An entry here multiplies the estimated time for the Work Order line

      6.  Part Kit

        If you have created a Part Kit to be used when this particular job is done, specify it here. It will then be available for printing with the Work Order and alert the mechanic whether there are enough parts in stock to complete the job.

      7.  Cause Code

        This code is an optional feature based on your RTA system’s configuration settings. If active, select the cause for the repair.

      8.  Vehicle Status

        Set the status of the vehicle in relation to this specific job. A vehicle may have multiple active jobs with different status indicators.

      9.  Repair History

        Displayed here will be the last three work order numbers that document completed jobs matching this PM’s VMRS code.

      10.  Notes (Recommended)

        Add additional notes about this repair, typically: “Complaint”, “Cause” and “Correction”.

      11.  Warranty

        This button toggles whether or not this repair is covered by OEM warranty. The letter “W” will appear on the job line to indicate the warranty status.

      12.  Outside

        This button toggles whether this job will be performed in-house or by an outside vendor.

      13.  Template

        This button is used when a WO template is used to create the work order line. For more information see Template Work Orders in the RTA User’s Manual

    3. Select the “OK” button and you will be prompted for an additional line
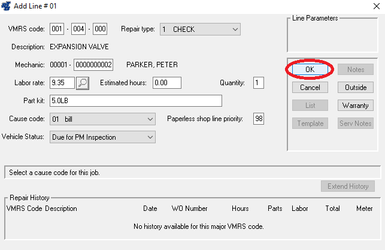
    4. Repeat steps 2 and 3 for additional lines. When all lines are opened for this Work Order, select the “Cancel” button. You can return to the Work Order later to add additional lines, post parts and labor, edit notes, etc…