How to Create a Purchase Order
- Enoch Poston
- Shelley Crouse
The use of Purchase Orders (POs) helps in managing Parts inventory, allowing you to keep track of the Parts purchases. Purchase Orders in RTA can be used even if actual POs are not issued. Purchase Orders can be created manually or automatically.
Step by Step guide
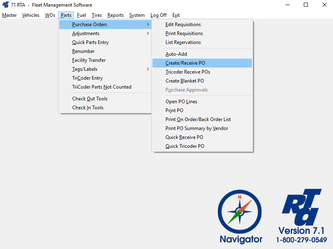
- Select Parts > Purchase Orders > Create/Receive PO (PPC) from the RTA main menu.
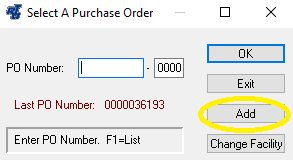
- Select the “Add” button.
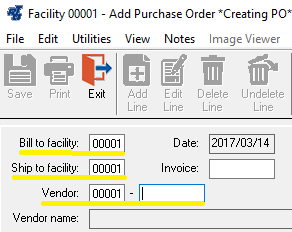
- Select your bill to and ship to facility and then key in the “Vendor Number”, or press “F1” for the lookup list. You can also enter in your Invoice number
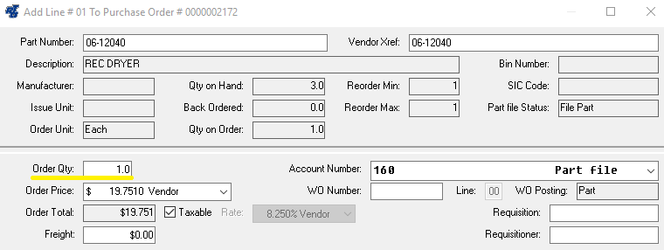
- After entering your Vendor and Invoice number, the Add Line window opens up automatically. Enter the “Part Number”, or press “F1” for the lookup list. If the Part number is not in RTA (as a Primary or Cross-reference Part number), you can choose the “Add” button to enter the Part into the system through the Part File Maintenance screen. If you choose “Continue”, the Part can be received through the PO; however, the purchase will be only associated with Vendor and no Part tracking will be available.
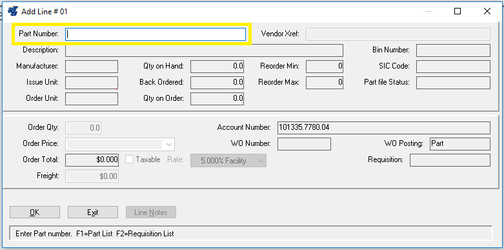
- The “Order Qty” will default to the Re-Order Quantity from your Part file but you can edit this field, keying in the Quantity to match the vendor’s invoice.
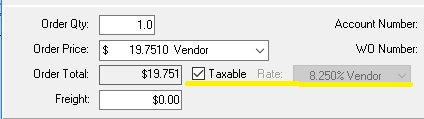
The tax rate from the Vendor File will be displayed and, by default, the “Taxable” box will be checked. If you are not paying tax on the invoice, then uncheck the “Taxable” box.
Select the “OK” button to complete the data entry for the line and you will be prompted for another Part number to be placed on the next line of the PO.
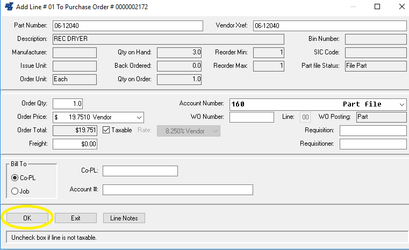
To add another Part to a new line, repeat steps #4 - #10. When all lines have been added, select “Exit” to return to the main Purchase Order screen.